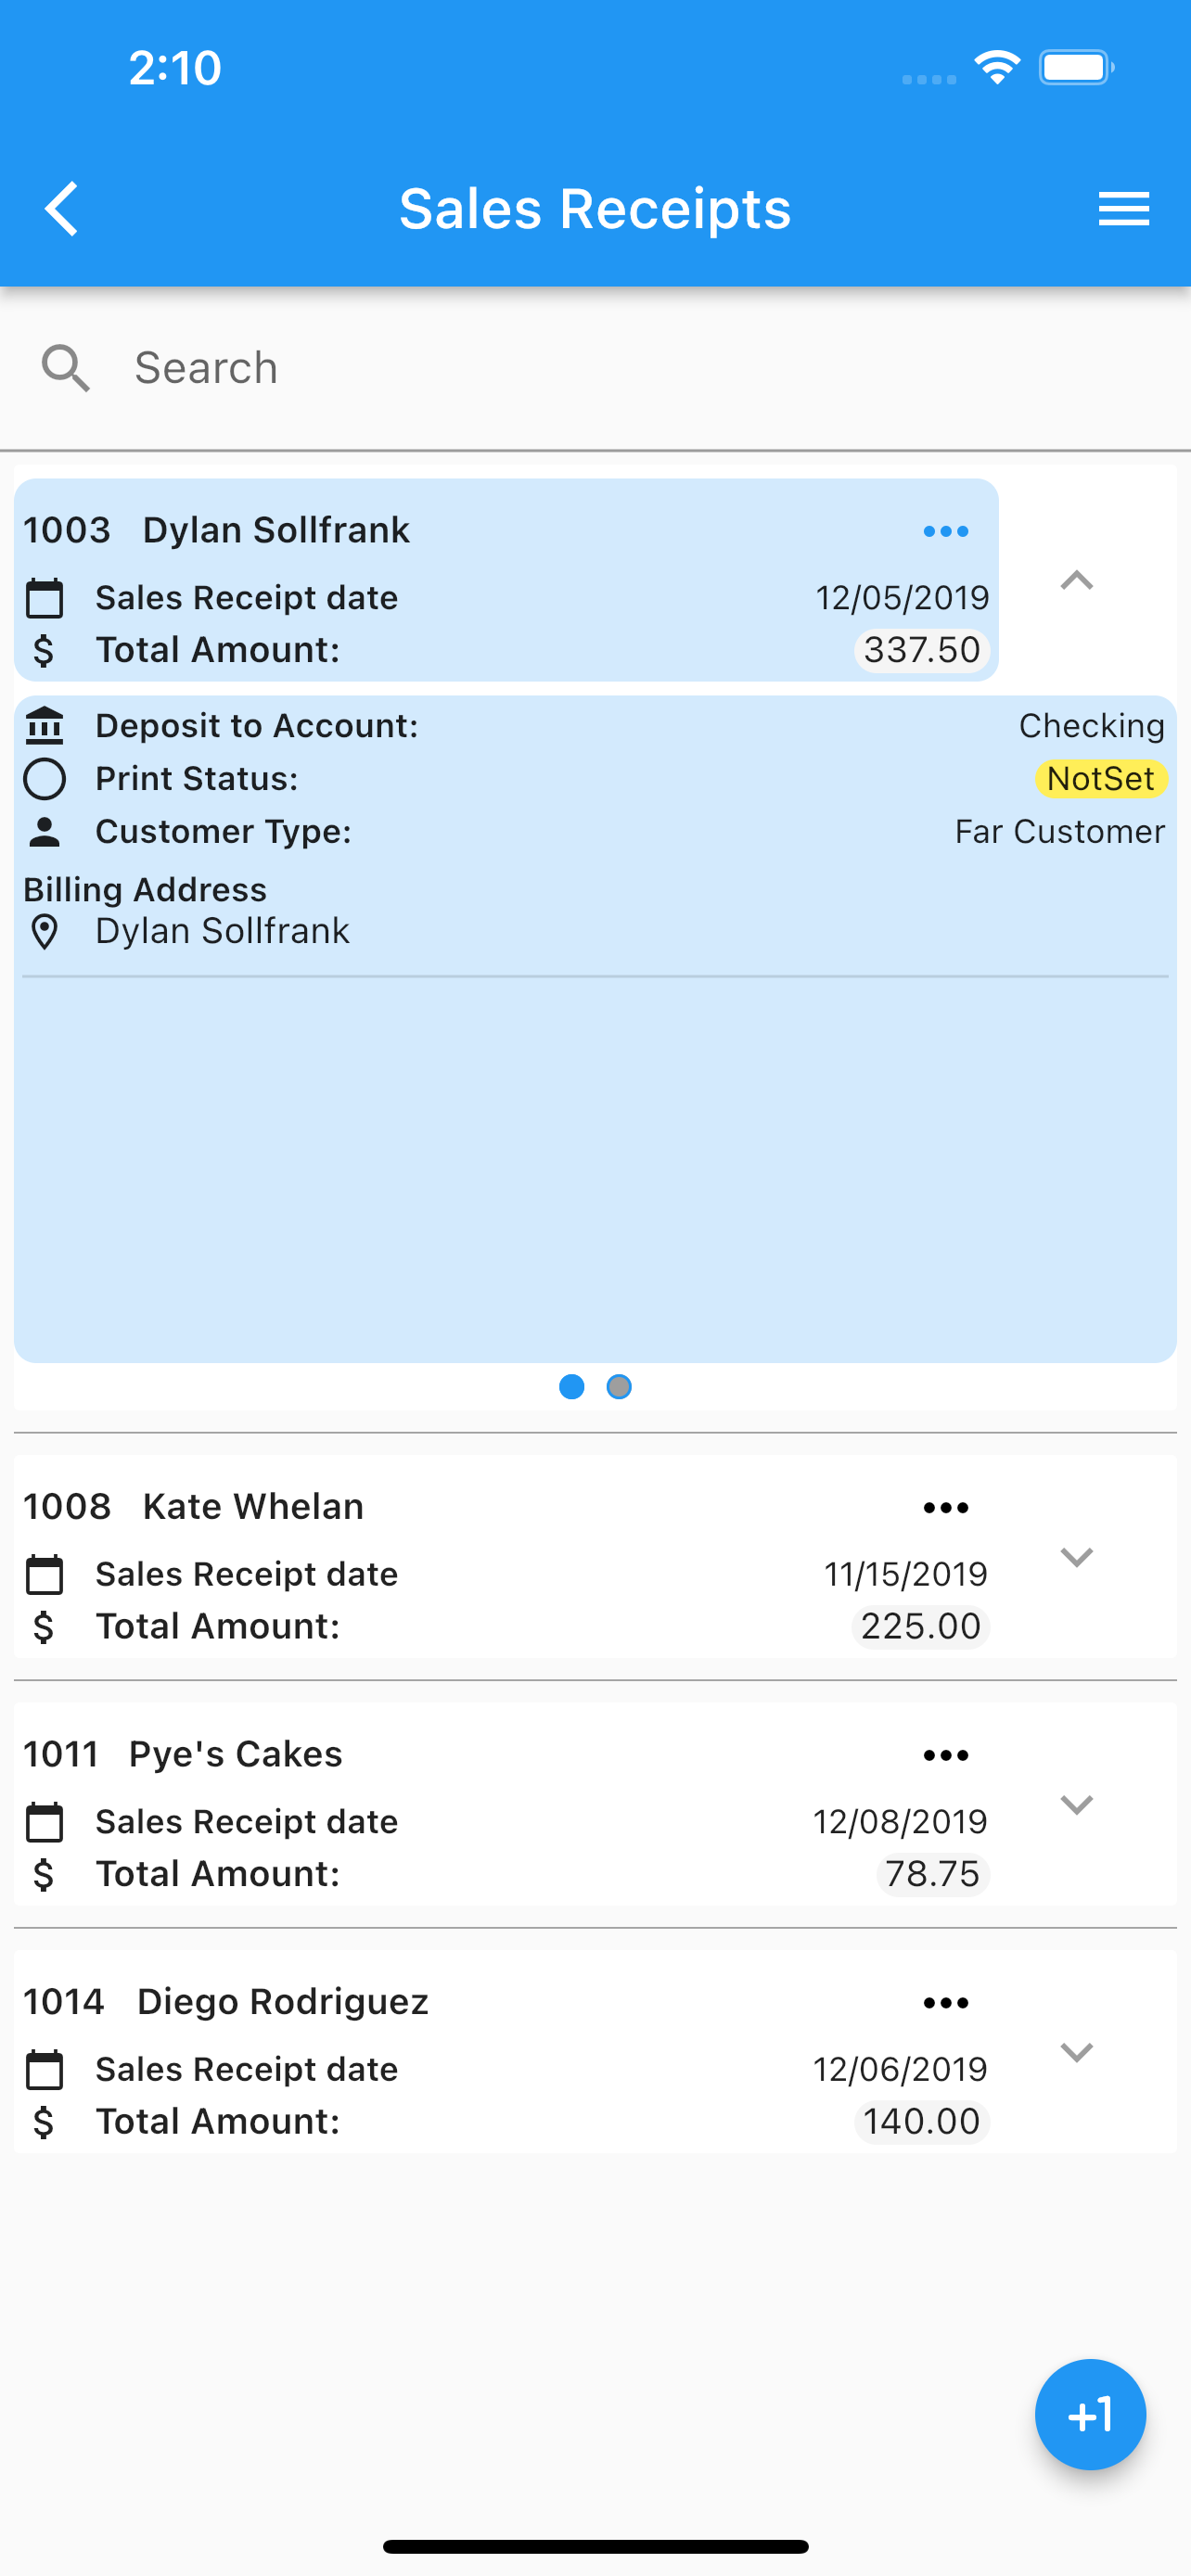
Sales Receipts
.
For Sales Receipts in QuickBooks Online, see Sales Receipt
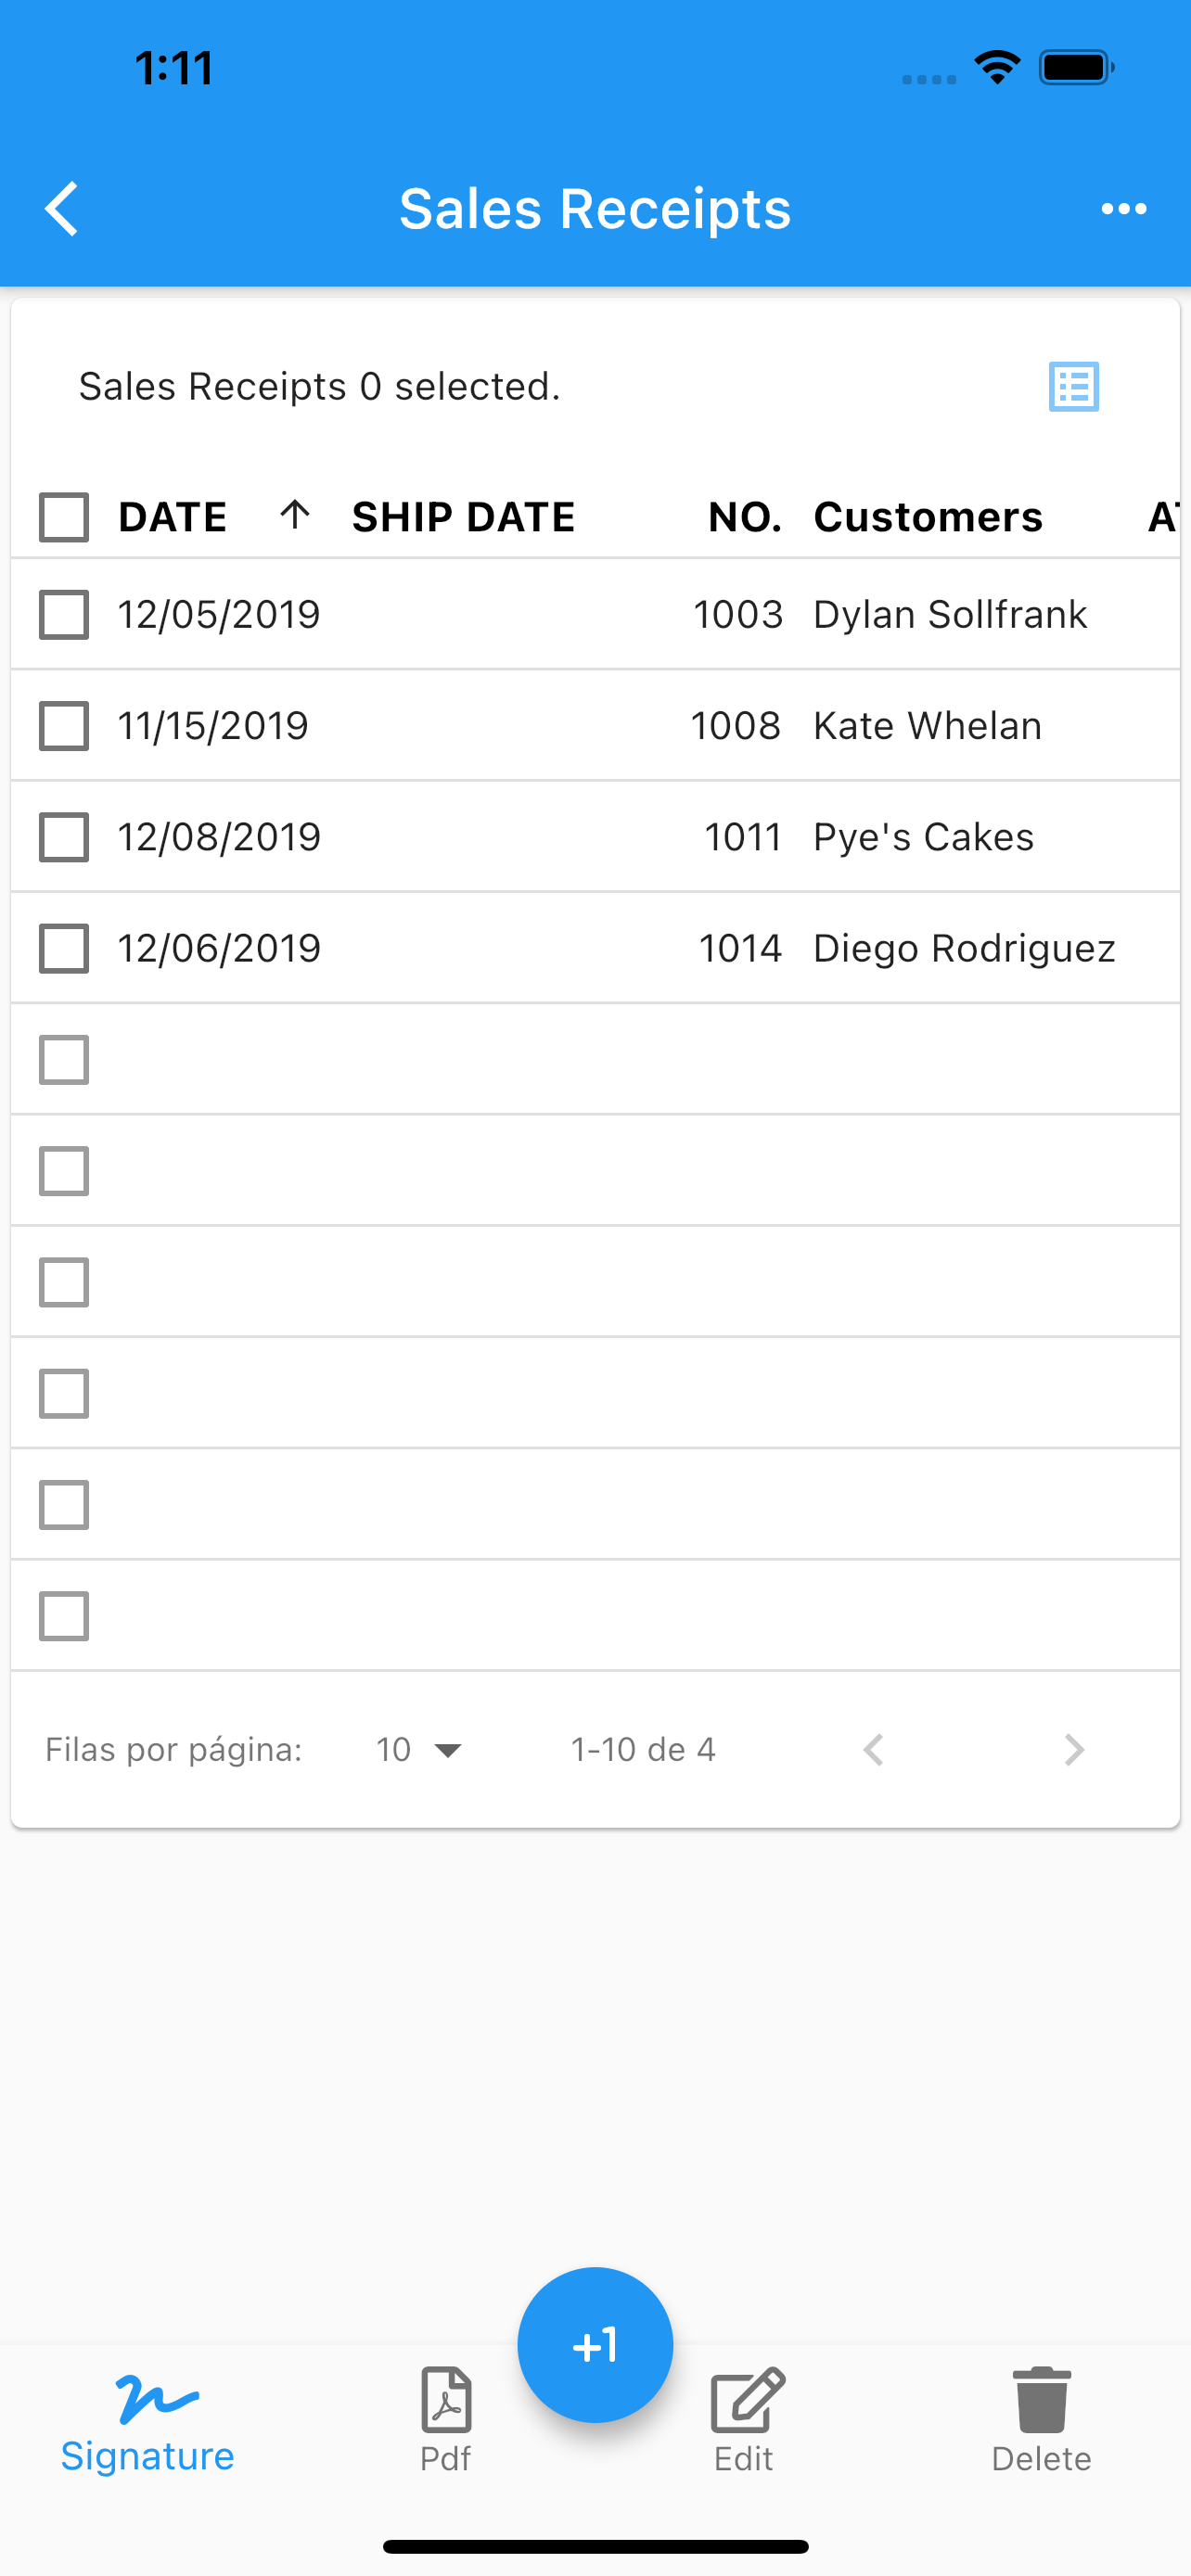
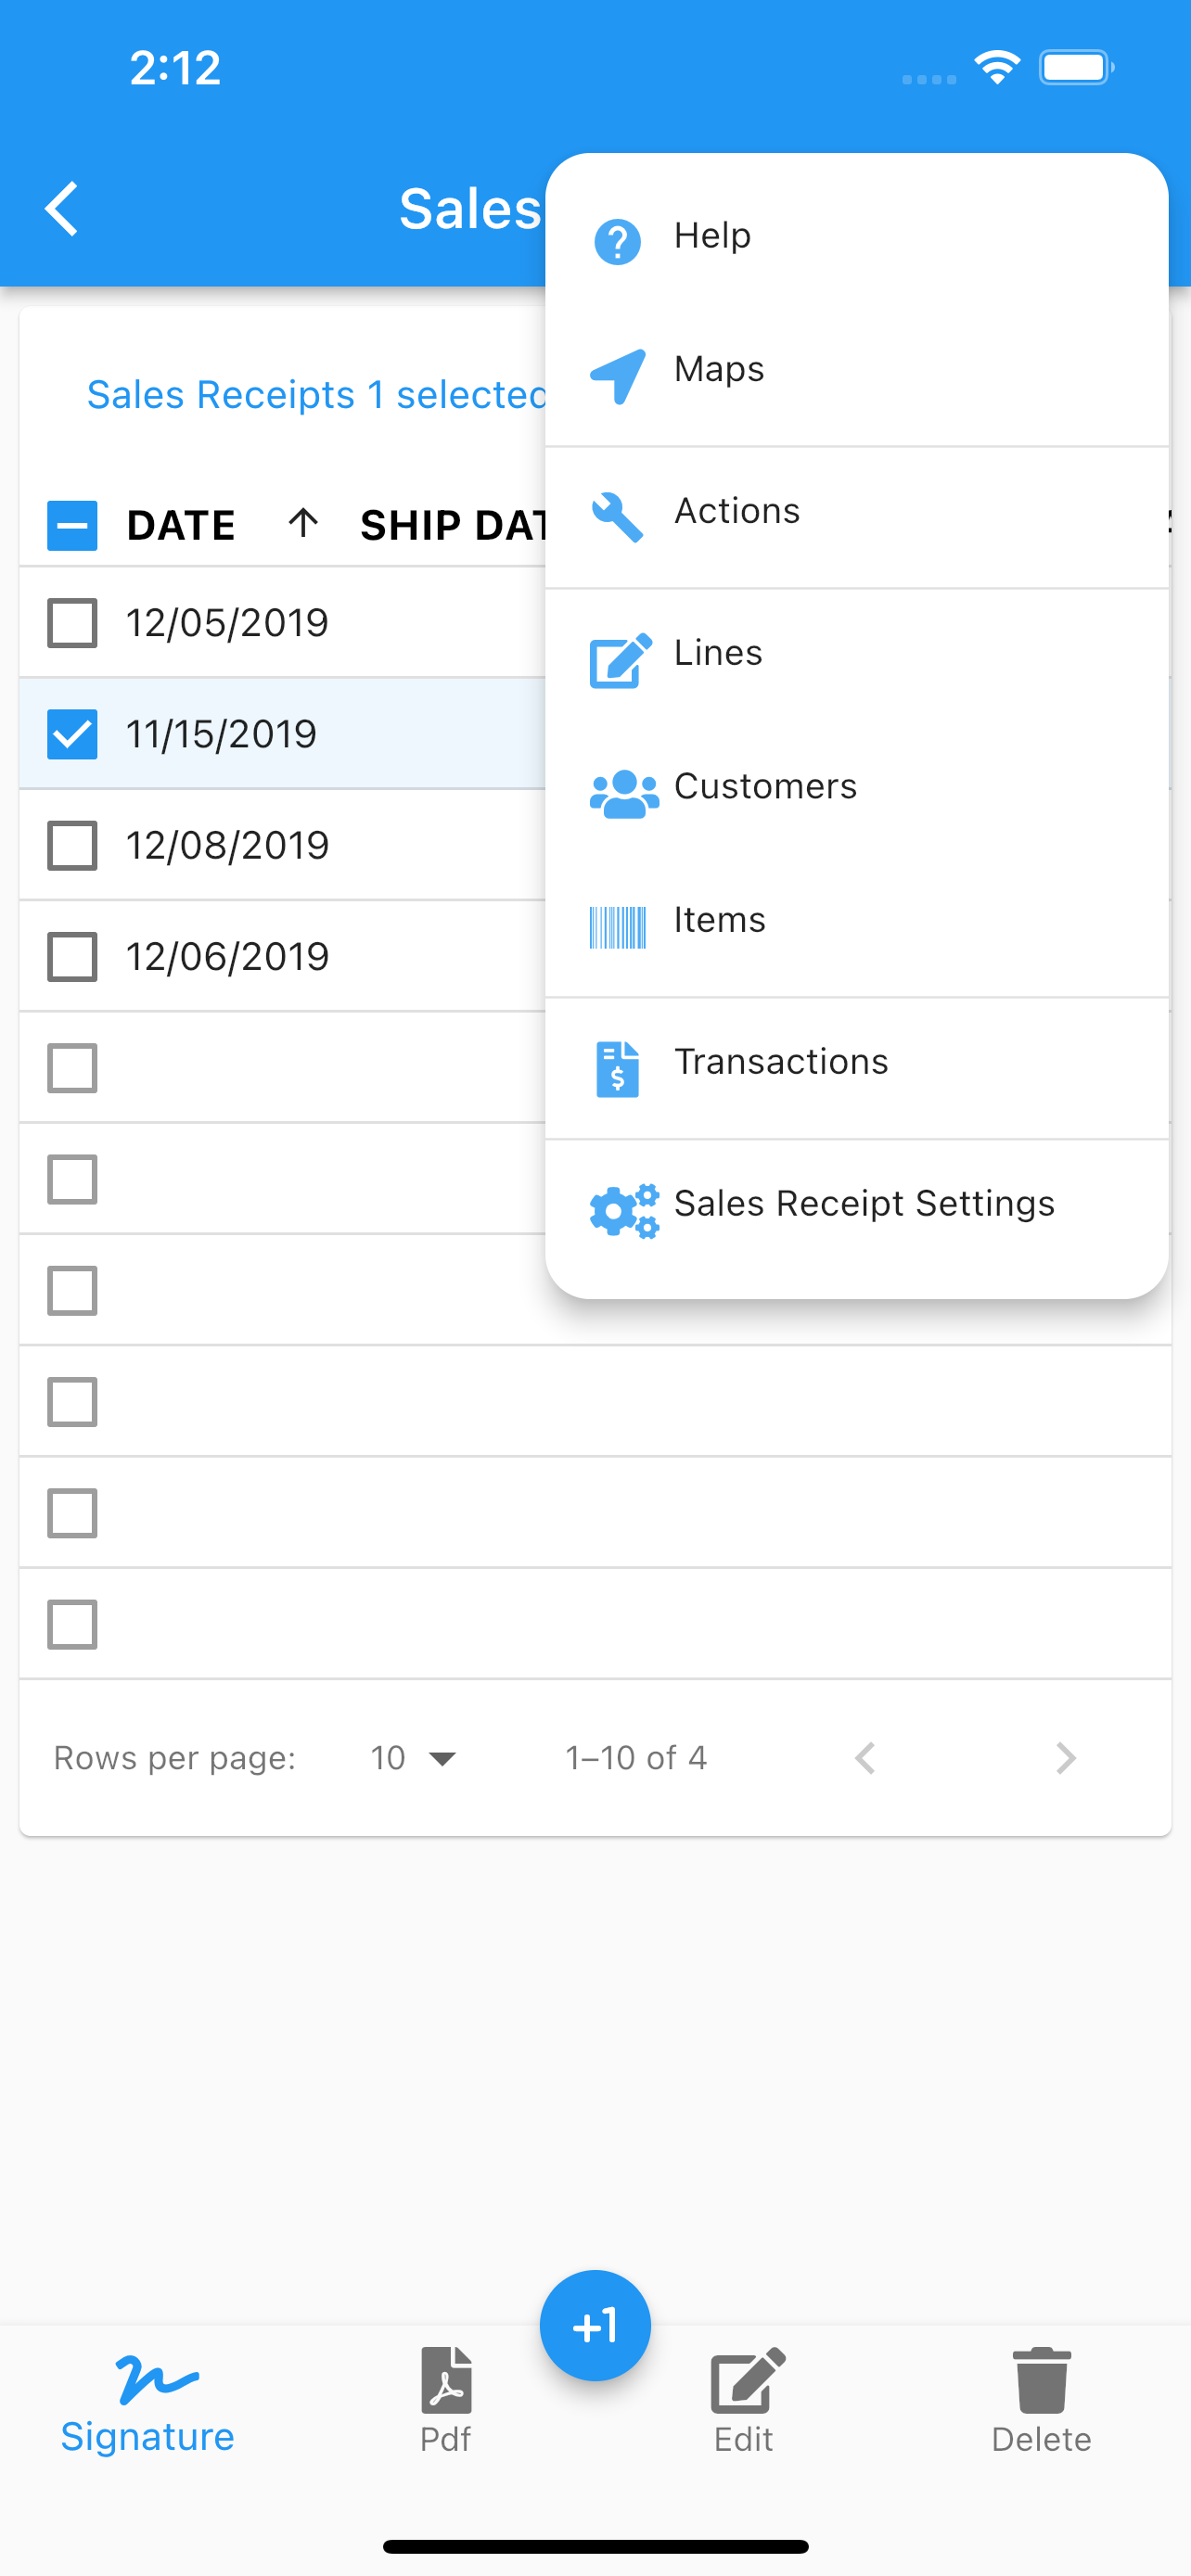
Under sales receipts one can see a menu (top right corner) and switch between table view or list view. Once you select (by double tapping) a sales receipt you can proceed to:
Edit.
Email.
Delete.
Generate a pdf with current data, including your company logo.
Share the pdf.
Collect a signature.
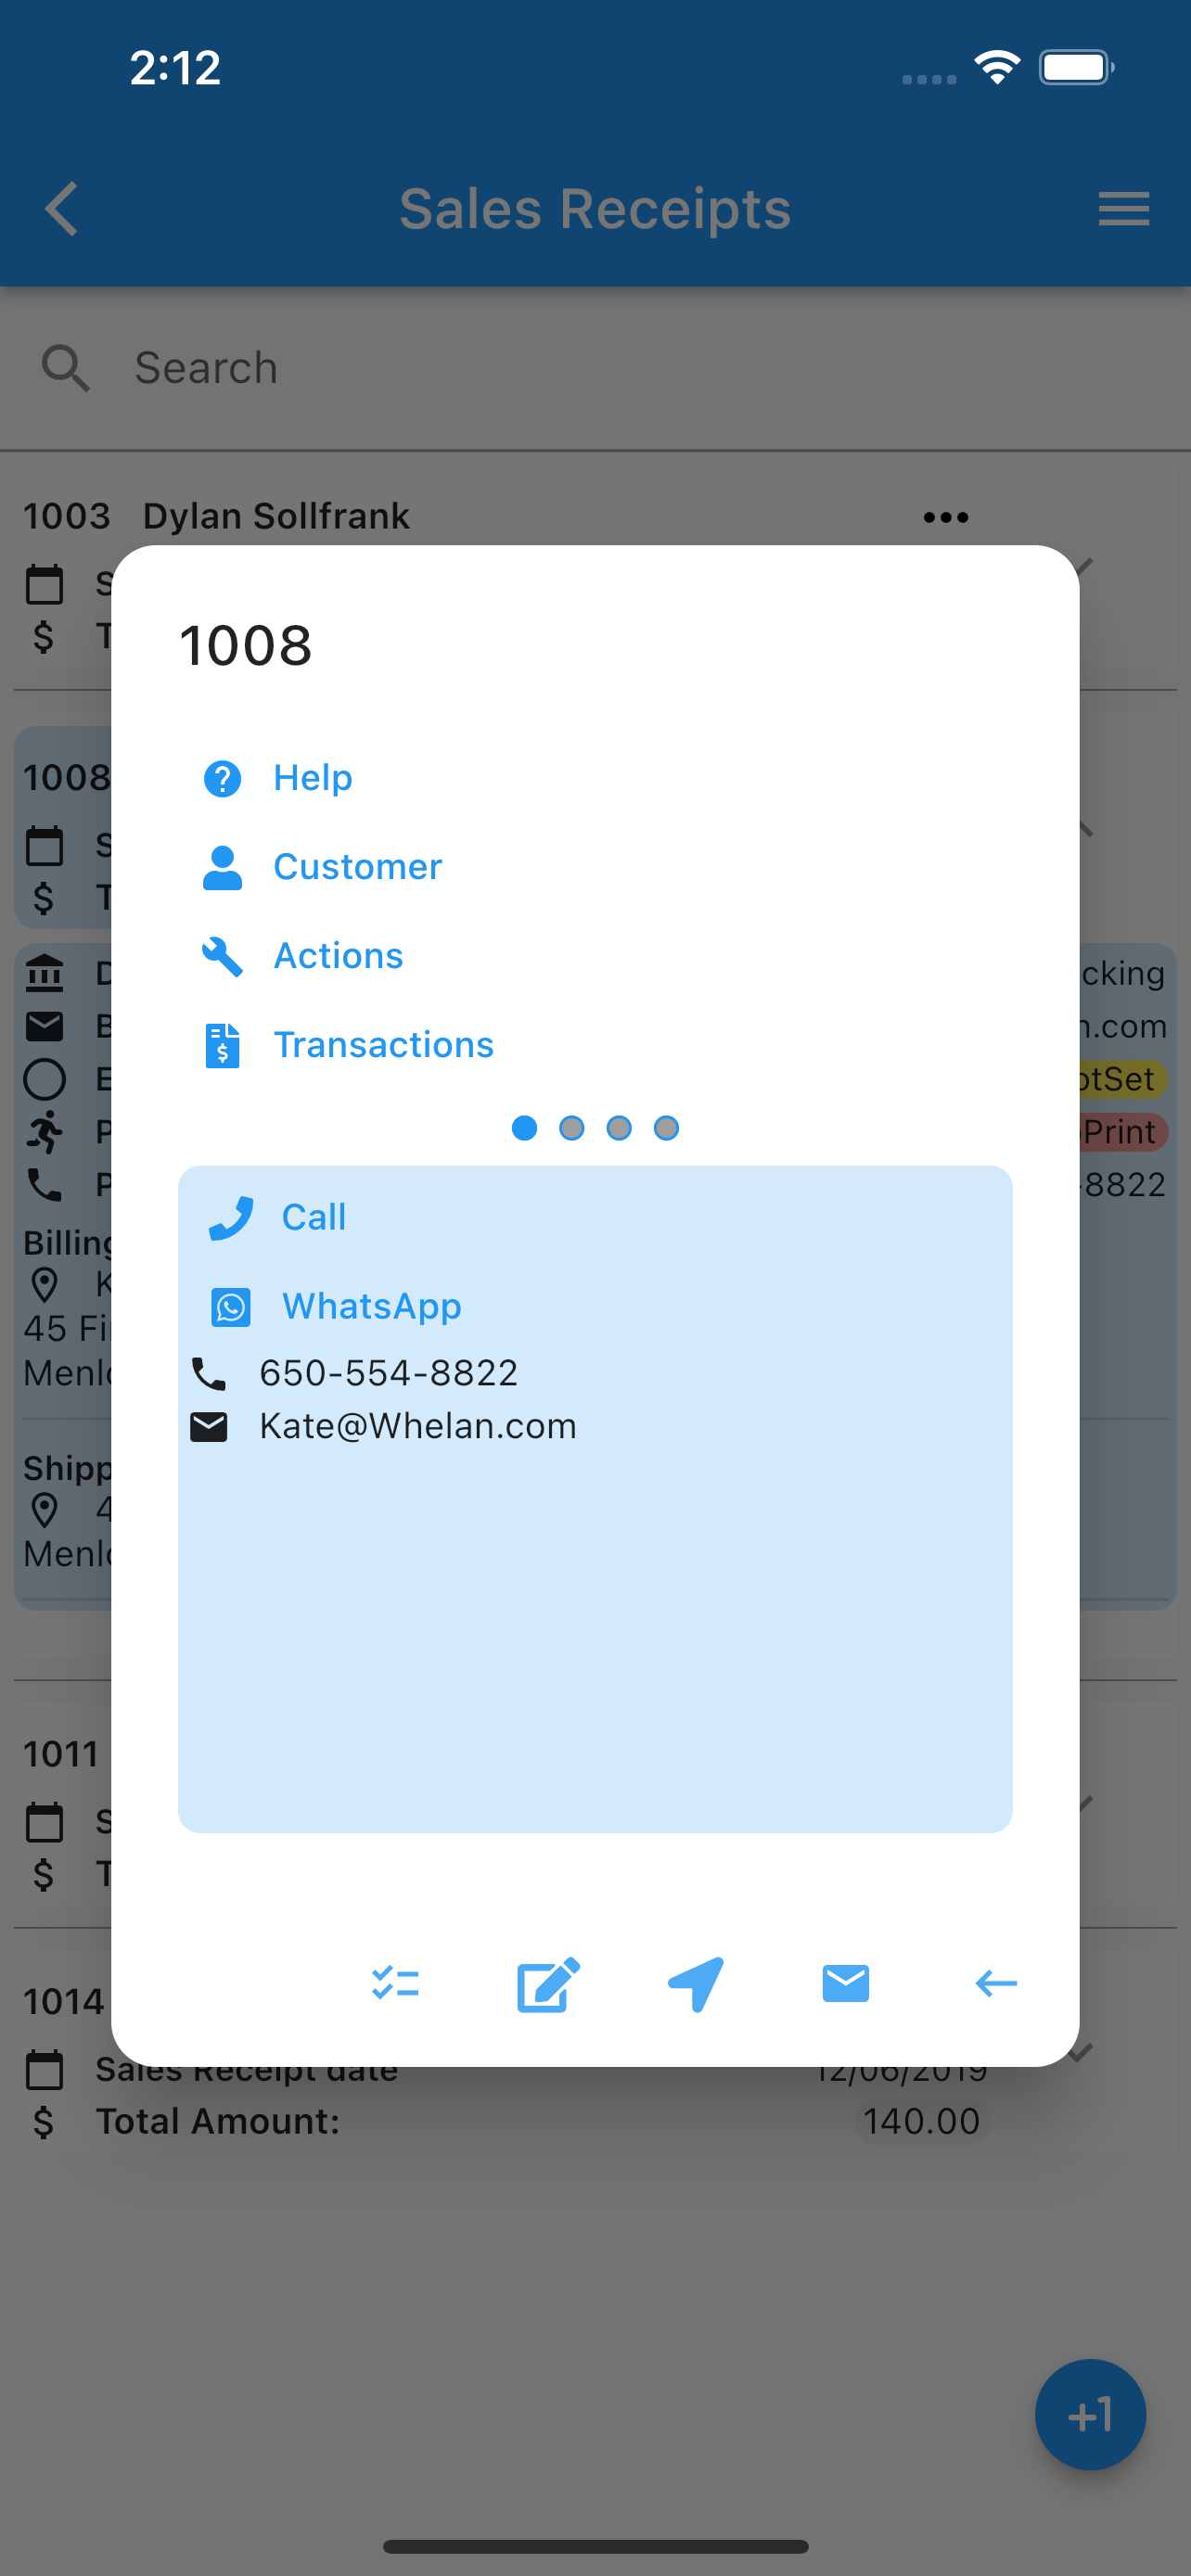
Go to sales receipt’s customer.
Add/Delete/Share sales receipt’s images.
Call the customer.
Use whatsapp to call or text.
Open the map app with the customer billing address.
Set configuration for the Sales Receipt’s page.
Reload images from the cloud.
Enable/Disable sales receipts notifications.
Enable/Disable display columns under table view.
The search icon at the top, will filter the list by the search filter criteria applied to sales receipt’s number. The icon at the bottom indicate you can add a sales receipt.
Any data changed or created, the app will ask, while exiting the page for:
Back, to add more changes.
Cancel, to discard changes.
Ok, to save it.
Once the data is saved, the changes will propagate to any mobile user of the app, seamlessly.
More screenshots.